
Main Breakdowns of Maytag, Whirlpool & KitchenAid Refrigerators (and How to Fix Them)
- appliancefixlab
- Aug 2, 2025
- 24 min read

Updated: Mar 3

Modern Maytag, Whirlpool, and KitchenAid refrigerators are workhorses in our kitchens, but even these reliable brands can run into issues over time. (Fun fact: Whirlpool Corporation owns Maytag and KitchenAid, so these brands share many components and common problems.) In this comprehensive guide, we’ll cover the most common refrigerator breakdowns – from cooling problems to ice maker failures – and explain how to troubleshoot and fix each one. Whether you’re a homeowner looking to DIY or an appliance repair professional refreshing your knowledge, we’ve included detailed instructions, safety tips, and repair advice for everyone.
Key topics we’ll cover:
Fridge Not Cooling Properly (or **“no cool” issues)
Ice Maker Not Working (no ice or slow ice production)
Water Dispenser Problems
Frost Buildup, Leaks, and Condensation
Strange Noises or Compressor Cycling issues
Safety Precautions for refrigerator repair
When to Call a Professional, and why expert help can save the day (especially if you’re in Winnipeg, where our Appliance Fix Lab team is ready to assist!)
Let’s dive into each problem, what typically causes it in Maytag/Whirlpool/KitchenAid models, and how you can fix it.
1. Refrigerator Not Cooling Properly
One of the most common calls we get is, “My refrigerator isn’t cooling, but the light is on!” In other cases, the fridge isn’t running at all. This issue can range from elementary (accidentally turned off settings) to more complex component failures. Here’s how to troubleshoot a fridge that’s not cooling:
Verify Power & Settings: First, make sure your fridge is actually getting power. Check that it’s plugged in and the circuit breaker isn’t tripped. If the interior lights or control panel are dead, there could be a power issue – try another appliance in the same outlet to be sure power is present. Next, confirm the thermostat or temperature controls are set properly and haven’t been accidentally adjusted. Many refrigerators should be around 37°F (3°C) in the fridge and 0°F (-18°C) in the freezer. If someone bumped the controls or a child played with the panel, the fridge might simply be set too warm. Set the controls back to mid-range settings and see if cooling improves.
Check Airflow and Vents: Refrigerators need proper air circulation inside to cool all sections. Inspect the vents in both the freezer and fridge compartments – are they blocked by food items? An overstuffed freezer can block cold air flow to the refrigerator, side. Rearrange or remove some items so air can flow. Also, ensure the fridge isn’t packed too tightly; leave space for air to circulate between items. Blocked vents can lead not only to poor cooling but also to freezing in some spots and warm spots elsewhere.
Inspect Door Seals (Gaskets): Worn or dirty door gaskets can leak cold air. Take a look at the rubber seals around the fridge and freezer doors. If you see cracks, tears, or gaps – or if the gasket feels hard and no longer supple – it may be failing to seal the door shut. This lets warm air in and makes the fridge struggle to cool. Try the dollar-bill test: close the door on a dollar bill and see if you can pull it out easily. If it slips out without resistance, the gasket isn’t sealing well. Clean the door seals with warm soapy water (to remove grime that might prevent a good seal). If they are damaged or still not sealing, replace the gaskets so your fridge can maintain a cold, closed environment.
Clean the Condenser Coils: Dirty condenser coils are a frequent culprit for cooling problems. These coils (usually located either behind the refrigerator or underneath it) dissipate heat. If they’re covered in dust, pet hair, or debris, the fridge can’t release heat efficiently and the compressor has to work overtime – sometimes leading to overheating or poor cooling. Unplug the refrigerator, locate the coils (check your manual – on many Maytag/KitchenAid French-door models, they’re behind the bottom front kick-plate). Use a vacuum with a brush attachment or a special coil cleaning brush to gently remove dust. Be sure to unplug the fridge first for safety. Cleaning the coils can dramatically improve cooling performance if they are clogged. (Tip: in homes with pets or lots of dust, aim to clean coils every 6-12 months to prevent this issue.)
Check the Evaporator Fan: If your freezer is cold but the refrigerator section is warm, the evaporator fan might not be working. This fan (usually in the freezer compartment) blows cold air from the freezer to the fridge. Open the freezer and listen – do you hear a fan running? If the fan is silent (and the freezer coils are heavily frosted), it could be stuck or burned out. A common sign is frost build-up on the freezer back wall and poor cooling in the fridge. You may need to remove the freezer panel to inspect the evaporator coils and fan. If the fan blade is jammed by ice, defrost the freezer (see Section 3 below) and see if the fan motor resumes. If the evaporator fan motor has failed, it should be replaced – this can be a DIY job on some models, but call a professional if you’re not comfortable with it.
Defrost System Problems: Another cause of “freezer cold, fridge warm” is a failure in the defrost system. Maytag/Whirlpool fridges automatically defrost the freezer coil periodically. If the defrost heater or defrost thermostat fails, ice can accumulate on the evaporator, blocking airflow. This results in the freezer getting icy and the fridge warming up. Signs include thick frost on the freezer evaporator and maybe water dripping inside. Fixing this typically involves testing/replacing the defrost heater, defrost thermostat, or defrost control (which may be part of the main control board). These components usually require a multimeter test for continuity. For most non-technicians, this is a point where calling a repair service is wise – a pro can quickly test these and replace the faulty part.
Compressor or Sealed System Issues: If you’ve checked everything above and the fridge still isn’t cooling, the problem might be the compressor, the start relay, or the refrigerant (sealed system leak). A telltale sign of compressor trouble is if you hear it clicking on and off or running very hot, or if it’s completely silent while the fans are running. One common failure is the compressor start relay (a small device on the compressor that helps it start). A burned-out relay can prevent the compressor from running – you might hear repeated clicks as the compressor tries to start and fails. You can test the start relay by unplugging it from the compressor and shaking it – if you hear a rattle inside, the relay is bad. A more definitive test is to use a multimeter to check the relay’s continuity; an open circuit means it’s faulty. Replacing a start relay is relatively easy and inexpensive, and it often fixes a no-cool situation. If the relay is good but the compressor still won’t run, the compressor itself may be “locked up” or have failed. Compressors can fail electrically or mechanically; diagnosing this beyond checking their winding continuity is difficult without specialized tools. Unfortunately, a compressor replacement is a major repair that must be done by a licensed technician (it involves handling refrigerant, which is regulated) – and it can be costly. The good news is that compressor failure is relatively rare compared to other issues. Electronic controls or sensors are more often the culprit. (One data set from Sears Home Services found that for KitchenAid refrigerators that won’t run, the electronic control board was the cause 64% of the time, while the compressor was only 9% of cases!). So, don’t jump straight to the worst-case scenario – rule out those simpler fixes first.
Troubleshooting Summary: Start with the easy fixes – power, settings, airflow, gaskets, and dirty coils. Make sure the fridge has plenty of clearance around it for ventilation (at least a few inches from the wall, and not jammed against cabinets) to avoid overheating. If the fridge still isn’t cooling, move on to checking fans, the defrost system, and the start relay. Always unplug the fridge before accessing internal components. If these steps don’t resolve the cooling issue, it might be time to call in a professional for advanced diagnostics.
2. Ice Maker Not Working (No Ice or Low Ice Production)
If your refrigerator has a built-in ice maker (common in many modern Maytag, Whirlpool, and KitchenAid French-door and side-by-side fridges), you might eventually face an ice-making problem. Maybe no ice is being made at all, or the ice cubes are smaller or misshapen, or the ice bin isn’t as full as it should be. Here’s how to troubleshoot an ice maker that’s not doing its job:
Check the Ice Maker’s Power/Switch: It sounds obvious, but first ensure the ice maker is turned on! Many models have a toggle switch or an arm that senses a full ice bin. If that metal shutoff arm is in the up position (or a switch is set to Off), the ice maker won’t make ice. Lower the arm or turn the switch on. Also, some digital fridges have an “Ice Maker Pause” or lock setting – make sure that’s disabled.
Verify Water Supply: The ice maker can only produce ice if it’s getting water. Check that the water supply line to the fridge (usually a 1/4” tubing connected to your household water pipe) is turned on and not kinked. A closed shut-off valve or a bent/kinked line will stop water flow. Pull the fridge out carefully and inspect the water line behind it. If you have an in-fridge water dispenser that’s also not working, that’s a clue the water supply is not reaching the fridge – focus on the supply line and water inlet valve. Also, consider water pressure: if your water dispenser is very slow, low pressure could result in the ice maker not filling fast enough. Ensure any saddle valve on your house water line is fully open, and check the water inlet valve on the fridge for proper operation if you suspect pressure issues (this is an electric valve that opens to let water into the ice maker; if it fails, no water goes in).
Replace or Flush the Water Filter: A clogged water filter can greatly reduce water flow to the ice maker. Most refrigerators have a replaceable filter (often inside the fridge or grille) that should be changed about every 6 months. If you haven’t changed your filter in a long time, do that first. An old filter can restrict water and cause either no ice or very small ice cubes. After installing a new filter, flush a gallon of water through the water dispenser if you have one (or discard the first batch or two of ice) to remove any air in the lines. This ensures proper flow and prevents air bubbles or drips. Keeping your filter fresh will not only help the ice maker but also give you cleaner, better-tasting ice.
Check the Freezer Temperature: The ice maker won’t produce well if the freezer isn’t cold enough. Make sure the freezer is around 0°F (-18°C). If it’s too warm (say 10°F or higher), ice production will slow or stop. A too-warm freezer might indicate a general cooling problem (see Section 1). Conversely, extremely cold freezers (below -10°F) can cause ice makers to jam or freeze up, but that’s less common. Aim for the 0°F sweet spot.
Inspect the Ice Maker Unit: Look inside the ice maker mechanism (you might need to remove the ice bin). Do you see any ice jams or obstructions? Sometimes, an ice cube can get stuck in the ejection arm or mold. If so, carefully remove any dislodged ice. If there’s a big chunk of ice clumping the mechanism, it might be leaking or overfilling – possibly a sign of a leaky water inlet valve or misaligned ice maker. Gently break up any ice clumps. Also, check that the ice maker assembly is sitting level and properly mounted – if it’s askew, water might be spilling and freezing in the wrong place.
Run a Manual Cycle (if applicable): Some ice makers have a manual test button, or you can jumpstart a harvest cycle (check your service manual). Running a cycle can force it to try to fill and eject. Listen for the water fill – if you don’t hear water come in at the end of the cycle, that points back to a water supply or inlet valve issue. If you do hear water but no ice ever drops, the ice maker could be malfunctioning internally (stripped gears, bad motor, etc.).
Small or Hollow Ice Cubes: If you’re getting ice, but the cubes are very small, half-hollow, or clumped, that often means not enough water is getting in on each cycle. Again, the water filter and supply line are critical here – low flow = small cubes. Ensure the supply valve is the correct type (a self-piercing saddle valve, for instance, can sometimes clog; a drill-type saddle valve or a proper tee is better for water flow). Also, verify the fridge is level, because if it’s tilted, water may not distribute evenly in the ice mold, causing half-cubes. Use a level tool on top of the fridge and adjust the feet as needed.
Ice Maker Component Failures: If, after all these steps, you still have no ice, the ice maker assembly itself might be faulty. This could be a bad motor, a defective ice level sensor, or a failed heating element (yes, ice makers have a heater to loosen the cubes!). At this stage, you might consider removing the ice maker and testing it or replacing it. On Maytag/Whirlpool models, the ice maker module can often be swapped as a unit. Before you replace it, though, also consider the water inlet valve – if it’s not opening properly or is clogged with sediment, it won’t fill the tray. A quick test: try swapping the fridge’s water inlet valve with a known good one (if you’re a professional with spare parts) or use a multimeter to check if the valve coil has continuity. This is getting into pro-level diagnostics; casual DIYers might prefer to have a technician handle it.
Tip: Keep your ice maker clean and use your ice regularly. If you don’t use ice often, the ice that sits there can cause the ice maker to cycle less frequently, and old ice can clump or even cause the mold to freeze up. For best ice quality, dump the ice bin occasionally and let fresh ice replenish. Also, replace the water filter on schedule to avoid slow ice and off-tasting ice.
3. Water Dispenser Not Working Properly
For refrigerators equipped with a water dispenser (often paired with the ice maker on the door or inside), problems can occur with water flow. You might press the paddle and get nothing, a very weak stream, or sporadic stops and starts. Here’s how to troubleshoot a non-working water dispenser:
Check the Lock Settings: Many fridges have a dispenser lock function (child lock). Make sure the water dispenser isn’t locked or in “off” mode. Usually, there’s a small lock icon or a button you must hold for a few seconds to toggle the lock. Refer to your fridge’s manual for how to enable/disable the dispenser lock. If it’s locked, you’ll get no water at all. Turn it back on and test.
Replace the Water Filter: Just as with the ice maker, a clogged filter can stop water flow. If water trickles out slowly or tastes bad, the filter is suspect. Install a fresh filter (making sure it’s the correct type for your model). After replacement, flush the system by running a few liters (or about a gallon) of water through the dispenser to remove air and carbon dust. Air in the line can cause sputtering or no flow, so don’t skip the flush. This step alone often restores water flow to normal if a very old filter was the cause.
Inspect the Water Line for Kinks: Sometimes the plastic tubing that carries water from the inlet valve to the dispenser can get kinked or pinched, especially if the fridge was moved. Check behind and underneath the fridge. Also, inside the refrigerator, some models route the water line up the door hinge – verify nothing is pinched at the hinge. Straighten any kinks or replace damaged sections of tubing. Even a partially kinked line can greatly reduce flow.
Listen for the Inlet Valve: When you press the water dispenser paddle, you should hear a faint “hum” or click from the back of the fridge – that’s the water inlet valve opening. If you hear it and no water comes, the line may be blocked or frozen (on some fridges, the water line goes through the door and can freeze in a very cold ambient environment, or if the freezer is overpacked against the door). If you don’t hear anything, it could be an electrical issue – the valve isn’t being energized (could be a switch or control board problem). One quick check: open the freezer door (on units with door switch interlocks, some dispensers won’t work with the door open) – obviously it should be closed for water to dispense.
Check for Frozen Reservoir or Lines: Many refrigerators cool the drinking water via a coil of tubing or reservoir tucked behind the crisper or in the door. If your fridge section is set very cold, that reservoir can sometimes freeze. The result: no water flow. If you suspect this, try increasing the fridge temperature a bit (to around 37–40°F if it was lower) and wait a few hours. Alternatively, you can remove the crisper drawers and locate the coiled water tubing; if it’s solid ice, you’ve found the issue. Thaw it out (use a hair dryer on low, carefully, or just shut off the fridge for a while) and see if water flows. To prevent re-freezing, you might need to adjust the fridge temperature or check the airflow (a fridge that’s too cold could indicate an overactive compressor or faulty thermostat).
Valve and Switches: If all else fails, the dispenser micro-switch (activated by the paddle) or the water inlet valve could be faulty. A multimeter can be used to test continuity on the switch – if pressing the paddle doesn’t close the circuit, the switch might need replacing. For the inlet valve, as mentioned, check its coil for continuity. Advanced users could also apply 120V AC briefly to the valve coil (with water line connected) to see if it opens and water flows – but extreme caution: only do this if you’re experienced with electrical work, as it involves live voltage. (Most people will opt to have a technician handle this part.)
Often, water dispenser issues come down to filter or line problems. They’re usually easier to solve than ice maker problems. If you’ve checked everything and the dispenser still won’t work, consider calling a professional to avoid buying unnecessary parts. Sometimes the refrigerator’s main control board is at fault (not sending power to the valve), but that’s less common.
4. Frost Buildup, Leaks, and Condensation Issues
Have you ever opened your fridge and noticed water pooling under the crisper drawers? Or found a sheet of ice on the freezer floor? Maybe you see frost forming on food packages or condensation on fridge walls. These symptoms all relate to moisture problems, which can have a few different causes. Let’s break down the common scenarios and fixes:
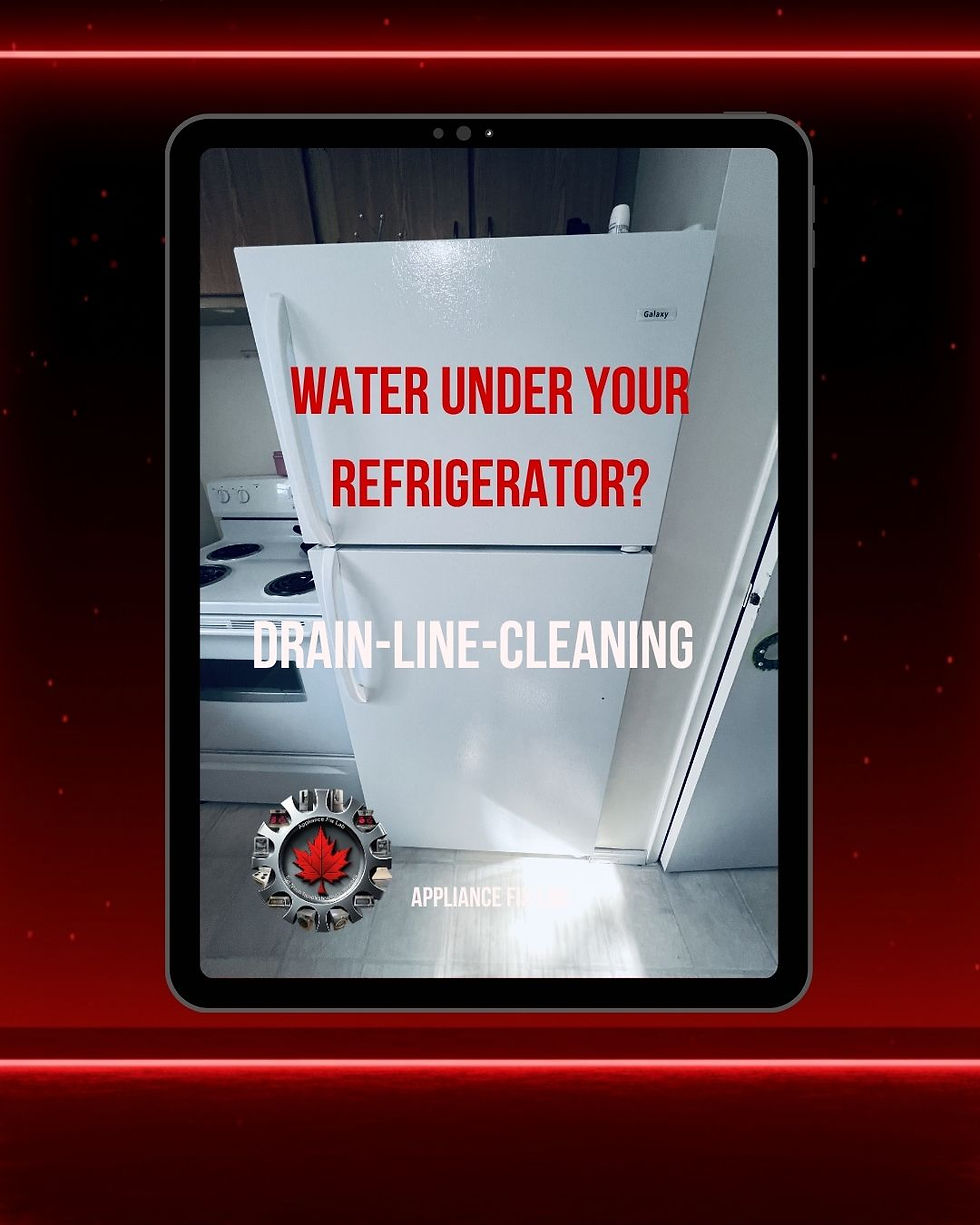
a. Water Leaking Inside or Under the Fridge: If you find water inside the fresh food compartment (like puddles under produce bins) or even dripping out the front, the usual culprit is a blocked defrost drain. During the auto-defrost cycle, water should drain from the freezer evaporator pan down a tube to a drain pan beneath the fridge. If that tube gets clogged (with ice or debris), the defrost water has nowhere to go and ends up seeping into the fridge or onto the floor. To fix this, do the following:
Unplug the fridge and locate the drain hole. In many freezer-on-bottom models (common for KitchenAid/Whirlpool French doors and Maytag bottom-freezers), the drain is at the back of the freezer compartment (you may need to remove the freezer drawer or rear panel to see it). In freezer-on-top units, the drain is in the bottom of the freezer compartment.
If you see ice clogging it, you can melt the ice using hot water. A handy method is using a turkey baster or syringe: squirt hot water down the drain hole to melt the blockage. You might need to repeat this a few times. Having some towels handy is wise. Ensure you also clear any gunk or food debris that might be blocking the drain at the opening.
Once water flows freely through to the drain pan (you’ll hear it dripping into the pan below), the leak inside should be solved. It’s a good idea to mix a teaspoon of baking soda in a cup of hot water and pour that down as well – this helps clear gunk and slow algae growth in the drain tube.
If water is leaking under the fridge, check that the drain pan (a shallow tray that catches defrost water) isn’t cracked and is positioned correctly. A cracked drain pan will let water out onto the floor – replace it if needed. Also, consider if the fridge has been leveled properly; if it’s way off level, water might spill off the pan before evaporating. Typically, though, drain pan issues are rare compared to clogs.
b. Frost in the Freezer / Excessive Ice Build-up: Frost on freezer walls or a big buildup of ice could mean the defrost cycle isn’t working (see defrost system in Section 1’s latter part – heater or defrost thermostat issues). It could also happen if a door was left ajar, allowing moist air in. If you find a heavy frost situation, the immediate fix is to do a manual defrost: remove food to a cooler, unplug the fridge, and let the freezer thaw out completely (or carefully speed it up with hot water or a hair dryer). Once everything is melted and dried, plug it back in. If the frost returns in a matter of days or weeks, then the defrost system likely has a failure that needs repair (heater, thermostat, or control board).
Another cause for localized frost could be an air leak – check the freezer door gasket for damage, just as we did the fridge gasket. If the gasket isn’t sealing, humid air sneaks in and condenses/freezes inside, leading to frost layers. Replace any bad gaskets to keep the seal tight.
c. Condensation in the Fridge: If you notice a lot of moisture on the walls or shelves in the fridge, or even mold growth, that’s excess humidity inside. This often ties back to door gaskets not sealing (warm, humid air getting in). Ensure the doors close fully – don’t overload the fridge such that something pushes against the door. Also, check that the fridge is cooling properly to around 37°F; a warmer fridge holds less moisture on the evaporator coils, and more will show up on surfaces. High ambient humidity (like in Winnipeg’s humid periods) can also contribute – the fridge will have more condensation to deal with. Use the humidity controls (if your crisper drawers have humidity settings, keep them appropriately set and closed). Wipe up water and don’t leave standing water (like spills) in the fridge.
If you have water droplets collecting at the top of the fridge compartment or under shelves, it could be a partially blocked drain as well – the water from defrost might be overflowing into the fridge rather than fully draining. So, ensure that the defrost drain is clear as described earlier.
d. Water on the Floor in Front: Often, this is from the defrost drain issue discussed, but it can also come from the water dispenser/ice maker connections if they leak. Inspect the water line connections at the back of the fridge and underneath (some fridges have connectors at the bottom for water to the freezer door). If there’s any sign of leaking (mineral deposits, water drips), tighten the fittings or replace any defective tubing. Another possibility: if you recently changed the water filter, a poor fit could leak – make sure the filter is seated correctly and the O-rings lubricated (a bit of water or food-grade silicone on the O-ring can help it seal).
Lastly, excessively humid weather can overwhelm the drip pan if the fridge doors are opened frequently – in rare cases, you might see water on the floor due to pan overflow. In very humid conditions, try to open the doors less often and check/empty the drip pan if possible.
5. Unusual Noises or Short Cycling
Your refrigerator normally makes some sounds – a gentle hum, occasional clicks or pops, whooshing of fans – but loud or strange noises indicate a problem. Also, if you notice the compressor turning on and off rapidly (short cycling) or running constantly, those are issues to address. Here’s what to check:
Level the Refrigerator: If your fridge is not level, it can vibrate or make rattling noises. Use a level tool on the top front edge. Adjust the front leveling legs (or rear legs/shims) until the unit is level left-to-right and tilting slightly back (most manufacturers recommend a slight tilt backward so the doors close easily). A properly leveled fridge minimizes vibrations and rattles. This can often quiet down a noisy fridge if the noise was due to cabinet vibration against the floor or surrounding cabinets.
Check for Loose Items: Sometimes the noise isn’t even a mechanical issue – it might be items on top of or inside the fridge vibrating. Remove anything balanced on top of the fridge (like bottles or boxes that could rattle). Inside, ensure bottles or jars aren’t touching and clinking when the fridge runs. Also, the drain pan underneath can sometimes vibrate if not seated right – with the fridge unplugged, reposition the drain pan securely.
Inspect Fans: There are typically two fans in a modern fridge: the condenser fan (near the compressor, behind or underneath the fridge) and the evaporator fan (inside the freezer section). A condenser fan choked with dust or with a bent blade can make loud whirring or whooshing noises. Unplug the fridge and look behind/below for the fan – clean off any dust on the blades and make sure it spins freely. If the fan motor is screeching or grinding, its bearings may be failing – you’d need to replace that fan motor. The evaporator fan (freezer fan) can make a chirping or high-pitch noise if it’s bad, or a loud buzz/hit if ice is hitting it. If you hear a fan noise only when the freezer door is closed (and it stops when open – note: many models shut the evaporator fan off when the door opens), suspect the evaporator fan. You might have to remove the freezer panel to inspect it. Clear any ice around it. If the blade is damaged or the motor is noisy, replace that motor.
Listen for the Compressor: A healthy compressor has a steady, low hum when running. If yours is making a loud humming, knocking, or clicking repeatedly, note the pattern. A click every few seconds with a brief buzz could be the start relay trying and failing – as mentioned earlier, that’s a start device issue. A loud humming that comes and goes in short bursts could indicate short cycling. Short cycling means the compressor turns on, runs for a very short time, then shuts off, and repeats frequently. This can be caused by: overheating (dirty coils, failing condenser fan) or electrical issues. To troubleshoot short cycling, do the following:
Clean the condenser coils (again, heat buildup can cause the compressor to shut off on its internal thermal limit).
Ensure the condenser fan is running – if the compressor is on but its fan isn’t, the compressor will overheat and cycle off quickly. Replace or repair the fan if it’s not working.
Check the power supply – brownouts (low voltage) or a bad refrigerator power cord can sometimes cause cycling if the compressor can’t get enough starting torque. Make sure the fridge is on a dedicated outlet with proper voltage.
If the issue persists, the cause could be internal – a bad overload protector, or the compressor itself aging. This is more technical, but an HVAC tech or appliance technician can test the compressor’s amperage draw and determine if it’s tripping off due to an internal fault.
Other Noises: A gurgling or boiling sound is often normal (refrigerant moving in coils). A hissing or sizzling sound could be the sound of the defrost cycle (water dripping on a hot defrost heater – also normal in moderation). A loud bang or thump when the compressor shuts off can happen if the mounting springs inside are worn – it’s somewhat benign, but annoying. Unfortunately, the fix for that is compressor replacement, which isn’t usually justified just for noise. If the noise is a constant high-pitched tone, it might be coming from the electronic inverter board (for inverter compressors) – also something a technician would need to address or replace.
Quick fix for rattles: One trick we use is to push against different panels of the fridge when it’s making noise – if pressing on a side or the top quiets it, perhaps a panel or screw is loose. Tighten any loose screws on the back cover, hinge covers, or any accessible part. Even the compressor’s mounting can be tightened if needed (careful not to over-tighten and cause vibration).
In general, unusual noises are a cry for attention from your fridge. Identify the source area of the noise and address it as above. Most noise fixes are relatively straightforward (cleaning fans, tightening parts). If your fridge is short-cycling or never shutting off, those impact cooling and longevity – don’t ignore those. Short cycling, especially, can indicate a deeper issue that, if unresolved, could stress the compressor. Take action to clean and check fans, and if needed, get a pro to evaluate the system.
6. Safety Precautions for DIY Refrigerator Repair
Before you grab your tools and start fixing your fridge, safety first! Refrigerators are heavy, powered appliances with both electrical and mechanical components. Here are some crucial safety tips to keep in mind whenever you’re troubleshooting or repairing:
Unplug the Refrigerator: Always disconnect power before you do anything beyond basic operations. Whether you’re cleaning coils, changing a component, or even just removing panels, unplug the fridge from the wall outlet. Refrigerators operate on 120V AC, which can shock or even electrocute. The only exception is when you need it powered for certain tests (like checking voltages or listening for a compressor/fan) – those are advanced procedures. For any component replacement or inspection, keep it unplugged.
Beware of Moving Parts: Even after unplugging, know that some parts can still move. For instance, fans may spin down. And if you do have to plug in the fridge to test something, be extremely cautious to keep fingers, hair, and tools away from condenser fans, evaporator fans, etc., as they might start unexpectedly.
Handle with Care (Sharp Edges): The sheet metal panels and fins on evaporator or condenser coils can be sharp. Wear work gloves when reaching into tight areas or when using tools to remove panels to avoid cuts. Also, be mindful of glass shelves, which can slip or break – remove and set aside any loose shelves or drawers before working inside the fridge.
Use the Right Tools: For most repairs, a basic set of tools will do: a set of screwdrivers (including Phillips and flat, and often 1/4” and 5/16” hex nut drivers for appliance screws), pliers, and a multimeter for electrical tests. If you’re testing continuity or voltage, ensure you know how to use the multimeter properly and have it in the correct setting. Never test live voltage unless you need to and you are confident – and if so, use insulated probes and keep one hand behind you (an old electrician’s trick to prevent current from traveling through your chest).
Avoid Freon (Refrigerant) Exposure: The refrigerant in modern fridges (often R134a or R600a, and others) is contained in the sealed system (compressor, coils). There is no need to ever cut or open those lines in a DIY scenario. It’s illegal to knowingly vent refrigerant. If you suspect a refrigerant leak or a bad compressor, that’s not a DIY fix – it requires licensed technicians with proper tools. Refrigerant itself can cause frostbite if it contacts skin and is harmful to inhale in concentrated amounts. So, do not tamper with sealed system components beyond externally examining for damage (and if you see oil residue on coils, that can indicate a refrigerant leak – time to call a pro).
Mind the Weight and Balance: Refrigerators are heavy and can be awkward to maneuver. If you need to pull your fridge away from the wall, do so carefully to avoid it tipping. Have someone assist if possible. Many units have wheels – still, move slowly to prevent tipping or rolling over toes. When tilting a fridge (to get to the bottom parts), never lay it completely flat (especially not on its back – this can allow oil to flow into the cooling lines). If you do tilt a fridge more than 45 degrees, when you set it back down, wait a few hours before plugging it in, to let oils settle back into the compressor.
Dispose of Parts Safely: If you replace a part like a circuit board or capacitor, discharge any old capacitors (they can hold a charge). Tape up the ends of any wires or components you remove so they don’t short if lying around. And follow local regulations for disposing of electronics or refrigerant-containing parts.
When in Doubt, Call a Professional: There’s no shame in calling a certified technician when a repair is beyond your comfort level. We’ve encountered many DIY fixes that, unfortunately, made things worse or even caused safety hazards. If at any point you’re unsure, it’s safer and often more cost-effective to get expert help than to risk injury or damaging the fridge further.
Now that we’ve covered safety, let’s talk about when it’s best to bring in a pro.
7. When to Call a Professional Refrigerator Repair Service
We’ve provided a lot of troubleshooting tips that you can try on your own. But sometimes a refrigerator problem is complex or dangerous enough that professional help is the best choice. How do you know when to call a repair service? Here are a few guidelines:
If you’ve tried the basic fixes and your fridge still isn’t cooling or still has the issue, it’s time for an expert. For example, if you cleaned coils, checked fans, etc., and the compressor still short cycles or the fridge is warm, a technician can use specialized tools to further diagnose control boards or sealed system problems.
For any sealed system repairs (compressor replacement, fixing a refrigerant leak, etc.), you must call a licensed refrigeration technician. They have the equipment to recover and recharge refrigerant and to brazing (weld) new parts in. These are not DIY jobs.
If you suspect an electrical control board failure or you notice burnt wires, a pro can accurately diagnose using schematics and replace boards or wiring harnesses correctly. Modern fridges have multiple circuit boards and sensors; misdiagnosing them can get expensive if you just guess and buy boards. A tech with manufacturer diagnostics can often pinpoint the exact issue. (Remember that statistic: control boards are a frequent failure – so it’s worth getting a solid diagnosis.)
Recurring problems: If your fridge has the same issue repeatedly (e.g., it leaks even after you cleared the drain, or it stops cooling again after a temporary fix), an expert might find an underlying cause you missed. For instance, if the defrost drain clogs over and over, a technician might install a drain heater or an updated drain kit to permanently solve it (a known fix on some Whirlpool models).
Safety concerns: If you see sparks, smell burning, or see smoke, unplug the unit and call for service immediately. Likewise, a fire hazard recall or known issue (for example, there have been instances of wiring harness issues in certain model fridges) should be handled by a professional or the manufacturer. Don’t continue to run a fridge that shows signs of electrical burning – it’s just not worth the risk.
Why call Appliance Fix Lab? Aside from being the folks who wrote this article 😊, our team at Appliance Fix Lab deals with Maytag, Whirlpool, KitchenAid (and many other) refrigerators every day. We have the specialized tools and genuine OEM parts to fix it right. Our experienced technicians can save you time and stress by quickly identifying the problem and fixing it safely. We also warranty our repairs, giving you peace of mind. So while DIY is great for minor issues and maintenance, the best option for major refrigerator breakdowns is to contact a specialized appliance repair company. If you’re in Winnipeg, Appliance Fix Lab is ready to help with professional refrigerator repair services. We’ll make sure your fridge is running like new, and we stand behind our work.
In Canada (and anywhere), a refrigerator is an essential appliance – especially with our temperature extremes, from hot summers to freezing winters. Don’t let a broken fridge spoil your food or your day. Whether you follow this guide to troubleshoot on your own or decide you’d prefer an expert touch, we hope you found this information helpful. Keeping your Maytag, Whirlpool, or KitchenAid refrigerator well-maintained and promptly fixing issues will ensure it serves you well for years to come.
We hope this comprehensive guide helps you understand and address the common refrigerator problems you might face. Remember, safety comes first – and when in doubt, our professionals at Appliance Fix Lab are just a call away in Winnipeg. Happy refrigerating!
Visit our website: www.appliancefixlab.ca
Appliance Fix Lab on YouTube
Email us at: appliancefixlab@gmail.com
Call us today:
Winnipeg (204) 955-5560


Comments